
Walk down the cooler aisle of any outdoor store and you will see claims printed on almost every lid: 3-day ice, 5-day ice, 10-day ice. Two coolers that look nearly identical from the outside can differ in price by a factor of five, and the expensive one justifies itself almost entirely on one promise, which is that the ice inside will still be ice when you need it.
Most buyers take these claims at face value or dismiss them as marketing. Both reactions miss the point. Ice retention is not magic and it is not a lottery. It is straightforward physics, and once you understand the handful of principles involved, you can predict how any cooler will perform, explain why your neighbor’s budget cooler sometimes outperforms a premium one, and roughly double the ice life of whatever cooler you already own without spending another dollar.
This guide walks through the complete science: how heat actually gets into a cooler, what insulation really does, why the type and shape of your ice matters as much as the cooler itself, and the packing and usage habits that separate a cooler that quits on day two from one that is still pouring cold drinks on day six.
Heat Always Wins Eventually: The Three Ways Warmth Gets In
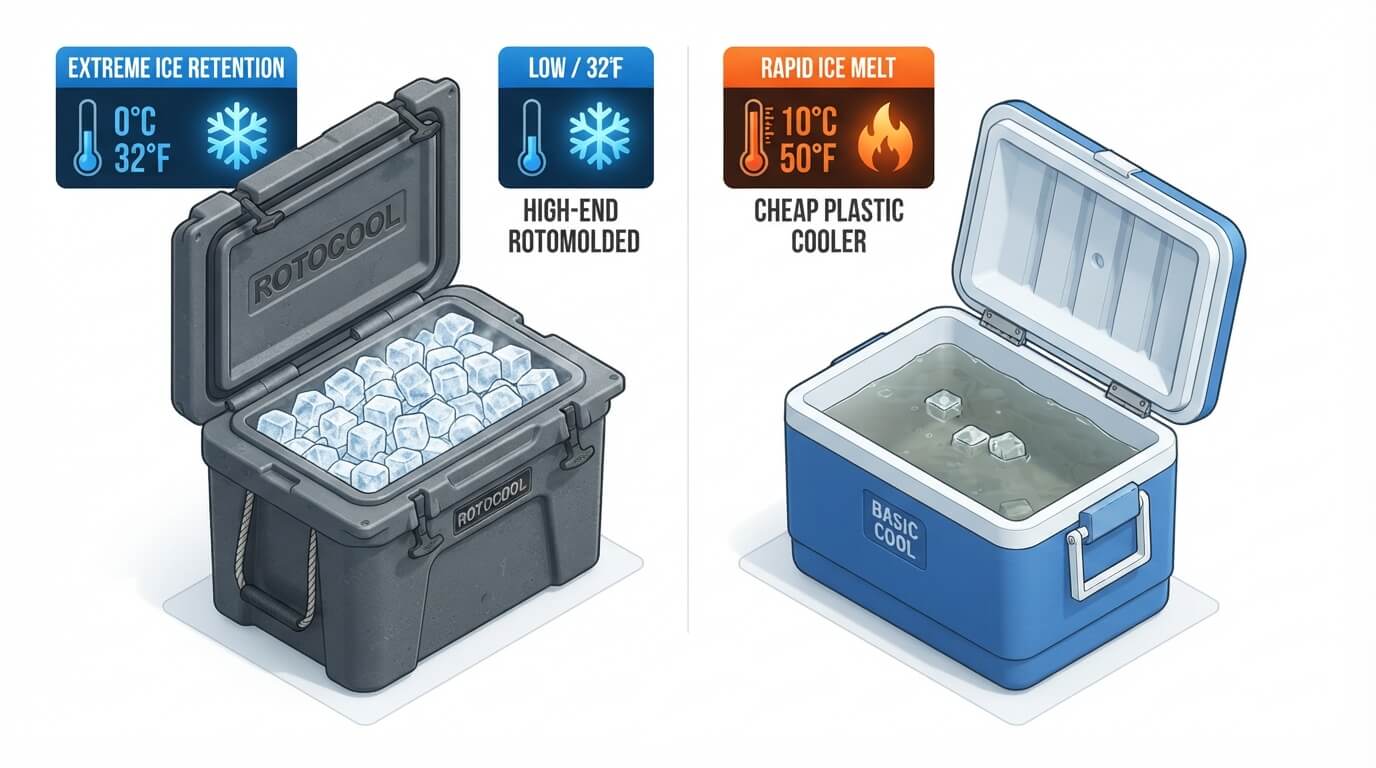
The first mental shift is this: a cooler does not “make” anything cold. It has no cooling mechanism at all. A cooler is simply a barrier that slows down the movement of heat from the warm outside world to the cold interior. The ice does the actual work by absorbing heat as it melts, and the cooler’s only job is to ration how quickly that heat arrives.
Heat moves in three ways, and a cooler has to fight all three simultaneously.
Conduction is heat moving through solid material by direct contact. When the sun-warmed plastic shell of your cooler touches the foam beneath it, and that foam touches the inner liner, and the liner touches your ice, heat is conducting inward molecule by molecule. Conduction is the main battlefield of cooler design, and insulation is the weapon. Materials like polyurethane foam conduct heat very poorly because they are mostly trapped gas, and gas is a terrible conductor.
Convection is heat carried by moving fluid, either air or water. Every time you open the lid, the cold, dense air inside spills out and warm air rushes in to replace it. That is convection robbing you in a single second of what your insulation defended for an hour. Convection also happens inside the closed cooler: warm meltwater circulates around remaining ice and accelerates melting, which is why drainage strategy matters more than most people realize.
Radiation is heat transferred by infrared energy, no contact required. A cooler sitting in direct sunlight absorbs radiant energy constantly, and dark-colored coolers absorb more of it than light-colored ones. This is why the same cooler can lose ice twice as fast on a beach in full sun as it does under a picnic table three feet away.
Every ice retention trick you have ever heard, from pre-chilling to burying the cooler in shade to taping the drain plug, is really just an attack on one of these three heat pathways. Keep that framework in mind and the rest of this article becomes intuitive.
Insulation: What R-Value Actually Means for a Cooler
Insulation performance is described by R-value, the same measure used for the insulation in your attic. R-value expresses resistance to conductive heat flow: the higher the number, the slower heat moves through the material. According to the U.S. Department of Energy, an insulation material’s R-value depends on its type, its thickness, and its density, and thickness is the variable cooler manufacturers manipulate most.
Here is roughly how the common cooler constructions stack up:
Thin-wall injection-molded coolers (the classic inexpensive picnic cooler) typically have one to two centimeters of foam, or in the cheapest models, just an air gap. Effective R-value is low, and ice life in warm weather is usually one to two days at best.
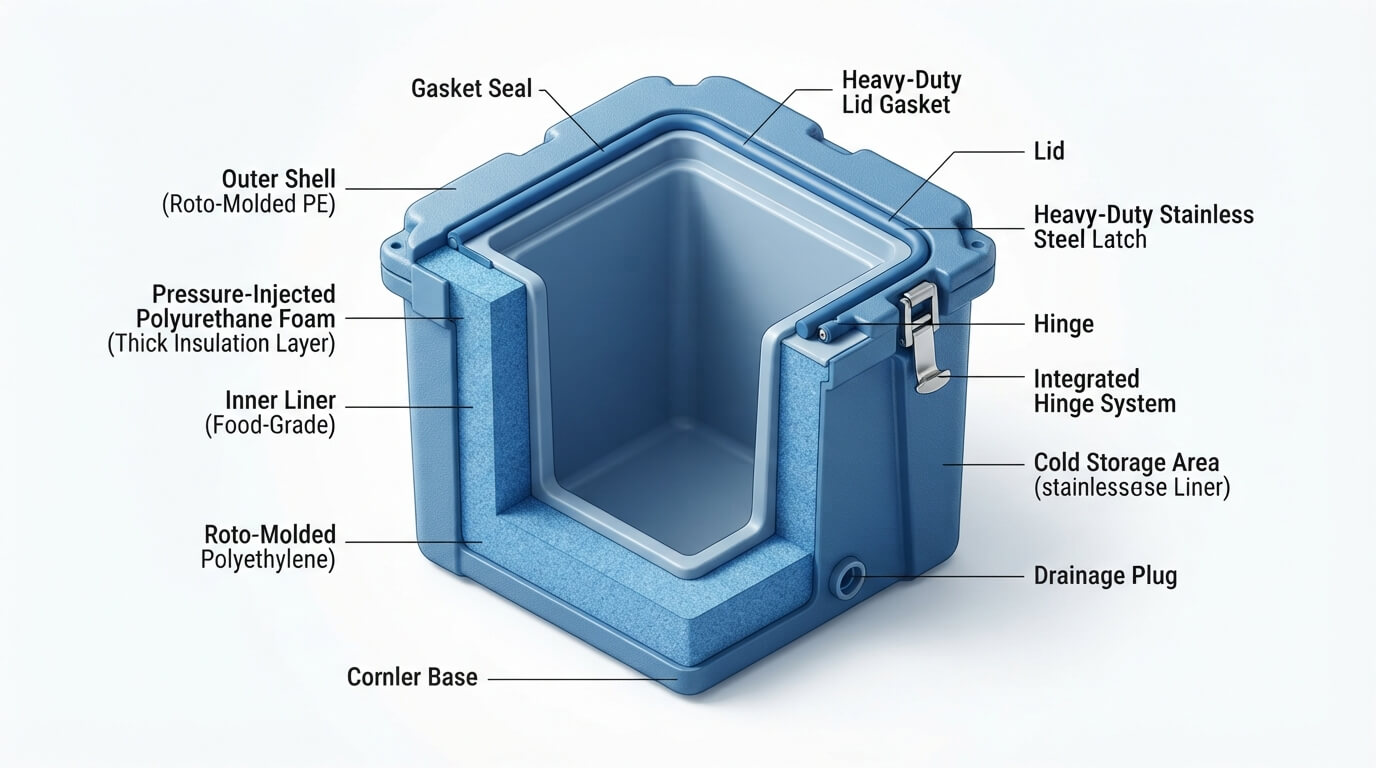
Rotomolded coolers (the premium category popularized by heavy-duty outdoor brands) are made by rotating a mold so plastic coats every surface in one seamless piece, and the resulting cavity is pressure-injected with polyurethane foam five to eight centimeters thick, including inside the lid. This is the core reason a rotomolded cooler holds ice for five to ten days: it simply has three to five times more insulation in the walls, with no thin spots or seams for heat to sneak through. If you want to see how this plays out between two premium builds, our Pelican Elite vs. Orca performance comparison tests exactly this.
Soft-sided coolers use closed-cell foam sheets, usually one to three centimeters thick, wrapped in fabric. They sacrifice retention for weight and portability, and a good one holds ice for one to two days, which is entirely adequate for a day trip.
The lid deserves special mention because it is the most common weak point. Heat rises, but more importantly, warm air contacts the lid constantly, and many budget coolers leave the lid hollow or thinly insulated. A cooler with thick walls and a hollow lid leaks heat through the top like a chimney in reverse. When you evaluate any cooler, press on the lid and check its thickness; it tells you more about real-world performance than the wall spec.
The gasket matters too. Premium coolers seal the lid against a rubber gasket, like a freezer door, which shuts down convective air exchange around the rim. Budget coolers with loose-fitting lids exchange air continuously through the gap, and in humid climates you can actually watch this loss happen as condensation forms around the rim.
Ice Is Not Just Ice: Why Form and Temperature Matter
Two coolers packed identically can perform very differently depending on what kind of ice went in, because ice varies in three ways that matter: temperature, surface area, and density.
Temperature. Ice from a gas station bag is often barely below freezing, sitting near minus 1 to minus 2 degrees Celsius. Ice from a deep freezer can be minus 18 degrees Celsius or colder. That “extra cold” is real stored capacity: before deep-frozen ice even begins to melt, it must first warm up to zero degrees, absorbing heat the whole way. Starting with deep-frozen ice can add a full day of retention compared with store-bought ice in the same cooler.
Surface area. Melting happens at the surface, where ice touches warmer air or water. Crushed ice and small cubes have enormous surface area relative to their mass, so they cool contents very quickly but melt fast. Block ice has minimal surface area for its mass and melts slowly. The classic expedition strategy uses both: block ice on the bottom for longevity, cubed ice filling gaps for immediate cooling and contact with contents.
Density and clarity. Ice frozen slowly (like a solid block frozen in a container over 24 to 48 hours) is denser and contains fewer air pockets than ice frozen quickly, and dense ice melts more slowly. You can make excellent block ice at home by freezing water in loaf pans, large food-safe containers, or even cleaned milk jugs. Frozen jugs have the added advantage of containing their meltwater, keeping the cooler dry, and giving you cold drinking water as they thaw.
A note on ice alternatives: reusable gel packs and frozen bottles work on the same physics but with different phase-change properties. Plain water ice absorbs about 334 joules per gram as it melts, which is an enormous amount of energy, and this “latent heat of fusion” is why ice outperforms simply refrigerated items at keeping things cold. Most gel packs have similar or slightly lower capacity per gram than plain ice, so their advantage is convenience and mess control rather than raw performance.
The Ice-to-Contents Ratio: The Number Most People Get Wrong
Ask experienced campers the single biggest ice retention mistake, and most will give the same answer: not enough ice. The widely used guideline is a 2:1 ratio, meaning two parts ice to one part contents by volume. For genuinely hot conditions or trips longer than three days, serious users go to 3:1.
That sounds extreme until you think about the physics. Ice does two jobs: it must first pull the contents down to a cold temperature, then absorb all the heat leaking through the walls for the duration of the trip. If you skimp on ice, the first job consumes most of it and the second job fails by day two.
This is also why pre-chilling changes everything. Warm cans hold a surprising amount of heat; a single room-temperature 12-pack can melt several pounds of ice just getting down to temperature. Refrigerate everything overnight before packing, and every gram of ice you load is available for wall-leak duty instead of drink-chilling duty.
Pre-chill the cooler itself too. A cooler stored in a hot garage has warm walls, warm foam, and a warm interior, and it will consume ice cooling itself down. The night before a trip, bring it indoors and toss in a sacrificial bag of ice or some frozen jugs. Discard or repurpose that ice in the morning and pack with fresh ice into an already-cold box. Users consistently report this single habit adds a day or more of retention.
Packing Strategy: Layering, Air Gaps, and the Meltwater Question
Once your ice and contents are cold, the way you arrange them decides how efficiently the system works.
Layer strategically. Cold air sinks, so ice on top of contents cools more effectively than ice underneath. The best structure for a multi-day cooler is: block ice or frozen jugs on the bottom, a layer of contents, cubed ice filling every gap, more contents, and a final layer of cubes on top. Items you need to survive longest (raw proteins, dairy) go deepest, near the blocks. Items you will grab frequently (drinks) go on top so you can retrieve them with minimal digging and minimal open-lid time.
Eliminate air space. Air inside the cooler is your enemy twice over. First, air warms quickly and transfers that heat to the ice. Second, every lid opening dumps the cold air and replaces it with warm, humid air, and the more empty volume the cooler has, the bigger that exchange. A full cooler dramatically outperforms a half-empty one. If you do not have enough contents, fill the void: crumpled towels, closed-cell foam pieces, or even more ice. This is also why buying an oversized cooler “to be safe” often backfires; a right-sized cooler packed full beats a big one packed half-empty. Our guide to coolers that keep ice frozen for five or more days discusses sizing in more depth alongside specific capacity picks.
The meltwater debate. Should you drain meltwater or leave it? The physics answer is nuanced. Cold meltwater at near zero degrees is still cold mass, and it insulates remaining ice better than air would, so for pure ice longevity, leaving the water in generally helps. However, water conducts heat to ice faster than air does when the water begins to warm, and food floating in meltwater is a spoilage and sogginess problem. The practical compromise most experts land on: keep food in waterproof containers or zip bags, leave the cold water in place for the first days, and drain only when the water begins to feel cool rather than cold, replacing volume with fresh ice if available.
Salt: a special-purpose trick. Adding salt to ice lowers its melting point, which makes the ice-water slurry colder than zero degrees. This is fantastic when you want to flash-chill drinks in twenty minutes, but it is counterproductive for longevity, because you are deliberately encouraging the ice to melt. Use the salt trick for rapid chilling, never for multi-day retention.
Environment and Behavior: The Variables Bigger Than the Cooler
Manufacturers test ice retention under controlled, generous conditions, which is why real-world results rarely match the number on the lid. The environmental variables often matter more than the hardware.
Shade versus sun. Direct sunlight adds a large radiant heat load and can raise the shell temperature far above air temperature. Keep the cooler in the deepest shade available, move it as the sun moves, and if no shade exists, cover it with a light-colored wet towel; the evaporating water actively pulls heat away from the shell, borrowing the same principle we explain in our article on how evaporative cooling works in dry versus humid climates.
Ground contact. Hot sand, sun-baked concrete, or a truck bed can be dramatically hotter than the air and conducts heat straight into the cooler’s base. Elevate the cooler on a board, a pallet, or anything that creates an air gap underneath.
Lid discipline. Every opening costs cold air. The households that get seven days from a five-day cooler are the ones that plan retrievals: know what you want before you open, grab it fast, close immediately. Many groups run a two-cooler system, one high-traffic drinks cooler that gets opened constantly and one food cooler that opens twice a day, because sacrificing the cheap drinks cooler protects the ice that matters.
Ambient temperature and humidity. Retention claims usually assume moderate ambient temperatures. At 35 degrees Celsius and high humidity, the temperature gradient driving heat inward is much steeper, and warm humid air entering on every lid opening carries extra latent heat that condenses inside. Expect real-world retention in tropical heat to be half or less of the rated figure, and plan ice quantities accordingly.
Diagnosing a Cooler That Underperforms
If your cooler used to hold ice well and no longer does, run through this checklist before blaming the weather.
Check the gasket and lid seal. Gaskets compress, crack, and pick up debris over years of use. A dollar-bill test works: close the lid on a bill and pull; if it slides out with no resistance at multiple points around the rim, the seal is compromised. Many premium brands sell replacement gaskets, and whether that repair is covered is exactly the kind of fine print we break down in our analysis of lifetime versus 5-year cooler warranties.
Check the drain plug. A weeping drain plug does not just leak water; it creates a convection channel exchanging interior and exterior air continuously. Ensure it seats fully and the O-ring is intact.
Inspect for shell damage. Cracks and deep gouges in the outer shell can admit moisture into the foam. Waterlogged foam conducts heat far better than dry foam, permanently degrading insulation. This is one failure that usually cannot be repaired and is worth checking before buying any used premium cooler.
Consider absorbed odors and residue. A cooler that has absorbed food residue is not a thermal problem, but the deep cleaning it prompts is a good moment to inspect everything above. Material choice affects how much smell a cooler retains over its life, something we cover in detail in our guide to cooler odor retention and plastic types.
Food Safety: The Retention Number That Actually Matters
It is easy to obsess over whether ice survives five days versus six and forget why we care: keeping food out of the temperature danger zone. Food safety authorities, including the U.S. Food and Drug Administration, advise that perishable food should be kept at or below 4 degrees Celsius (40 degrees Fahrenheit), and that bacteria multiply fastest between 4 and 60 degrees Celsius. The FDA’s guidance is worth reading directly at fda.gov’s food safety pages.
The practical implication: visible ice in the cooler is not, by itself, proof that everything inside is safe. Contents near the top of a poorly packed cooler can sit well above 4 degrees while ice persists at the bottom. A cheap appliance thermometer placed in the cooler, ideally near the food rather than buried in the ice, turns guesswork into measurement. The moment food-zone temperature climbs above 4 degrees and cannot be corrected with more ice, treat perishables on the standard two-hour rule that applies to any refrigerated food left out. The CDC’s food safety guidance covers these thresholds and the higher-risk foods that deserve extra caution on long trips.
For genuinely long expeditions, many experienced campers shift strategy entirely: freeze the food itself. Frozen meals, frozen meat, and frozen water bottles function as ice while protecting themselves, thawing gradually on a schedule you can plan meals around.
Advanced Territory: Dry Ice, Two-Cooler Systems, and Expedition Tricks
Once the fundamentals are habit, a handful of advanced techniques squeeze out the last increments of performance for long or demanding trips.
Dry ice. Solid carbon dioxide sits at minus 78.5 degrees Celsius and sublimates (turns straight to gas) rather than melting, leaving no water behind. Per kilogram it absorbs more heat than water ice and keeps contents genuinely frozen rather than merely cold, which makes it the standard for transporting frozen goods and week-plus expeditions. It comes with real handling rules: never touch it bare-handed (it causes instant frostbite-like burns), wrap it in newspaper or cardboard so it does not freeze-damage nearby food, and never seal it in an airtight container, because the expanding gas builds pressure. Most importantly, the CO2 gas it releases is heavier than air and displaces oxygen, so a cooler with dry ice must never ride in a closed passenger cabin without ventilation, and the vehicle should get fresh airflow. Many premium rotomolded coolers are rated dry-ice compatible; check before using it in a budget cooler, since extreme cold can crack low-grade plastic liners. A practical hybrid: a slab of dry ice on the bottom, regular block ice above it, and cubes on top. The dry ice keeps the block ice frozen for days, effectively recharging your conventional ice from below.
The two-cooler (or three-cooler) system. Beyond the drinks-versus-food split described earlier, long expeditions benefit from a third division: a “deep freeze” cooler packed with frozen meals and dry ice that is opened only once per day, a “working fridge” cooler for the current day or two of perishables, and a sacrificial drinks cooler that takes all the traffic. Ice migrates down the hierarchy as it partially melts, drinks-cooler ice getting replaced from the working cooler, which gets replenished from the deep freeze. Groups running this system report fresh food quality at day seven or eight that single-cooler campers cannot match at day four.
Reflective barriers and burial. Wrapping a cooler in a reflective emergency blanket or purpose-made cooler cover attacks radiant gain directly, and users in desert conditions report measurable ice-life gains. Older and more drastic: partially burying a cooler in shaded, damp earth exploits the soil’s stable temperature a foot down, which stays dramatically cooler than the air on hot afternoons. It is inconvenient, and it works.
Vacuum-insulated boxes. The newest frontier in passive cooling borrows drinkware technology: cooler walls containing vacuum-insulated panels rather than foam. Vacuum is the best insulator possible (no medium, no conduction), and early products in this class post ice-retention figures that embarrass even thick rotomolded foam. The trade-offs today are price and fragility, since a punctured panel loses its vacuum permanently, but this is the category to watch over the next few years, and exactly the kind of development we track in our Trends & Innovations coverage.
Frequently Asked Questions
Does opening the cooler quickly really matter that much? Yes, and it compounds. A single fast opening costs relatively little, but a family reaching in twenty times a day turns lid discipline into one of the largest controllable variables. The air exchange itself is quick and unavoidable once the lid lifts; what you control is frequency and how long the lid stays up while someone rummages. Organizing contents so anything can be found in five seconds is worth more than most hardware upgrades.
Should I put ice on top or bottom? Both, ideally, with blocks on the bottom and cubes on top. If you only have one layer’s worth, top placement cools contents more effectively because chilled air sinks through the load. The common habit of dumping a bag of ice in the bottom and piling food on it insulates the food from the ice with layers of packaging while leaving the top of the cooler warmest.
Is it worth paying for a premium rotomolded cooler if I only do weekend trips? Purely on ice retention, usually not; a good mid-range cooler managed with the techniques in this article covers 48 hours easily. The premium price buys durability, gasket sealing, bear-resistance certification where relevant, and long-horizon warranty support. If your duty cycle is two-day trips on gentle terrain, spend the difference on a deep freezer for making block ice, which will do more for your ice life than the cooler upgrade would.
Why does my ice melt faster at the beach than camping at the same temperature? Three compounding reasons: direct sun with no natural shade (radiation), hot sand conducting heat into the base far above air temperature (conduction), and typically higher humidity plus frequent opening for drinks (convection). Beach conditions are close to a worst-case scenario for all three heat pathways at once. Shade, elevation off the sand, and a dedicated drinks cooler recover most of the difference.
Do cooler dividers and baskets affect ice retention? Modestly, and positively. A divider lets you confine openings to one compartment, protecting the other’s cold air, and a basket keeps delicate items out of meltwater while letting you lift the whole top layer out in one motion, shortening open-lid time. Neither changes the insulation math, but both improve the human behavior that the insulation depends on.
How accurate are manufacturer ice-retention claims? Treat them as comparative rather than absolute. They are generally produced under favorable conditions: moderate ambient temperature, ideal ice ratios, unopened lids. A “7-day” cooler will rarely give a real family seven days in summer heat, but it will reliably outlast a “3-day” cooler under the same treatment. Use the ratings to rank coolers against each other, then apply the checklist above to get the most from whichever you choose.
Putting It All Together: A Retention Checklist
Everything above condenses into a routine you can run before any trip:
- Two days before: Freeze block ice or water jugs in the deep freezer. Refrigerate or freeze all contents that tolerate it.
- The night before: Bring the cooler indoors and pre-chill it with sacrificial ice.
- Packing morning: Dump the sacrificial ice. Layer blocks on the bottom, cold contents in the middle, cubes in every gap, cubes on top. Fill any remaining air space. Aim for at least 2:1 ice to contents.
- In the field: Shade always, elevated off hot ground, lid openings planned and brief, drain plug sealed, meltwater retained while cold.
- Throughout: Thermometer in the food zone; act on 4 degrees Celsius, not on how much ice looks left.
Do all of this with a mid-range cooler and you will routinely beat the out-of-the-box performance of a premium cooler used carelessly. Do it with a well-built rotomolded cooler and week-long ice stops being a marketing claim and becomes your normal experience.
The cooler industry has genuinely improved over the past decade, with better foams, better gaskets, and better molding. But the physics has not changed, and the physics is generous to anyone who works with it. Heat always wins eventually. Your job is just to make it fight for every degree.